This chocolate mousse recipe made with cocoa powder is one of the easiest recipes you can make and that too in just one bowl. Isn’t it great?
I had never made chocolate mousse with just cocoa powder. I always go with chocolate mousse with eggs or eggless chocolate mousse but I have used chocolate as main ingredient in both of these desserts.
Try by adding 1/2 teaspoon of instant coffee as coffee always enhances chocolate flavor. If you are making it for kids just follow the regular recipe mentioned here.
I always prefer to serve them in individual dessert cups like small glass used for shorts, pretty martini glasses etc. As this chocolate mousse recipe contains just 5 ingredients, it is very important to use highest quality ingredients. Cocoa powder is star ingredient in this recipe so make sure to use either dutch processed or dark cocoa powder.
Why this is the best chocolate mousse made with cocoa powder?
- Needs only 5 basic ingredients.
- Very easy and quick recipe as it gets ready in just 3-4 minutes.
- Made with only cocoa powder (no chocolate).
- Light and airy texture.
Ingredients needed
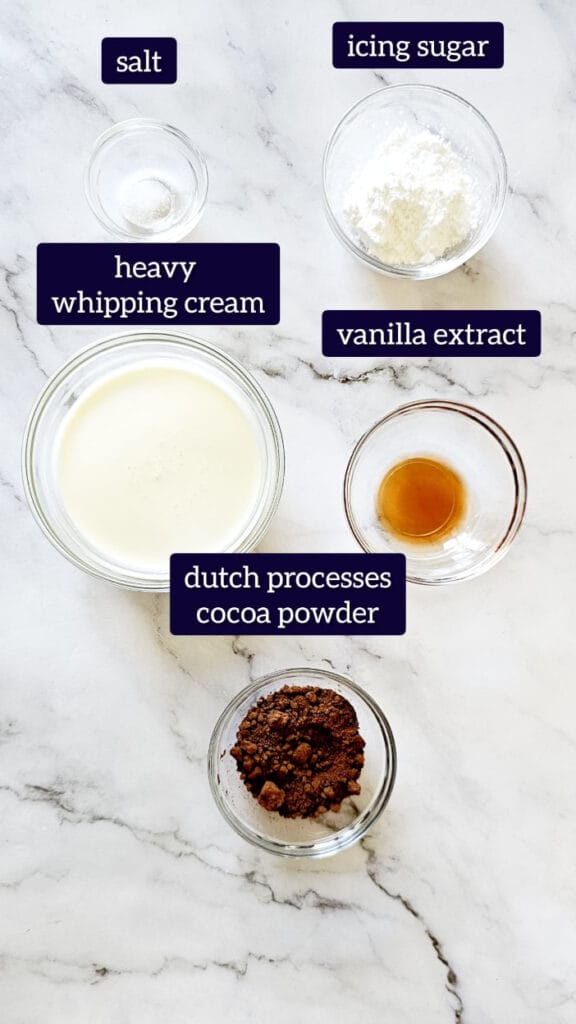
- Chilled whipping cream – I can not emphasize enough the importance of chilled whipping cream. To get that perfect airy structure for mousse, we will need to chill the whipping cream and it also whips faster than warm cream. I have used regular heavy whipping which is 35%. I do not recommend half-n-half or any less fat than 35%. It will not whip properly and will ruin our cocoa powder chocolate mousse.
- Dutch processed cocoa powder – As the name suggests, cocoa powder is the most important ingredient in this recipe. I would highly recommend to use dutch processed cocoa powder or hersheys dark cocoa powder for that intense chocolate flavor.
- Icing sugar – I am using store bought icing sugar here. You can also get this as confectioners sugar in some part of the world. Store-bought icing sugar or confectioners sugar contains corn starch which will help to stabilize our chocolate mousse. Did you run out of icing sugar? don’t worry, you can easily make icing sugar at home.
- Vanilla extract – I have used pure vanilla extract in this recipe/ It is ok to user regular vanilla extract or vanilla imitation but pure extract will give you burst of flavors that is just unforgettable.
- Salt – Very important ingredient. As I always say, do no afraid to add little salt in your dessert as it will enhance the flavor and make your desserts amazing.
List of tools
- Glass bowl
- Stand mixer / Hand mixer
- Measuring spoons
- measuring cups
- Weighing scale
- Serving bowls
Overview – chocolate mousse recipe made using cocoa powder
I have given all the step-by step instructions below but let’s quickly go understand the process.
| Sr. No | Overview (Bake without Freezing) |
| 1 | Add all ingredients in one chilled bowl. |
| 2 | Whip all of the ingredients together until stiff peak. |
| 3 | Chill in refrigerator for an hour or two. |
| 4 | Serve chilled and enjoy! |
Watch how to make it (video)
Step-by-step recipe (with images) to make delicious chocolate mousse by using cocoa powder
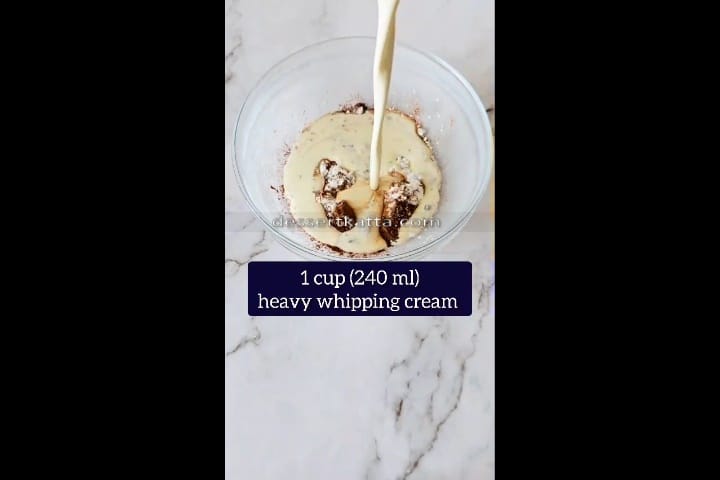

- In a chilled glass bowl, add chilled whipping cream, dutch processed cocoa powder, icing sugar, vanilla extract and salt. If you are using stand mixer then placed stand mixer bowl in freezer for at least 20 minutes. (I am using hand mixer so I am doing it in regular glass bowl)
- Start whipping on low speed so that all ingredients will come together nicely.

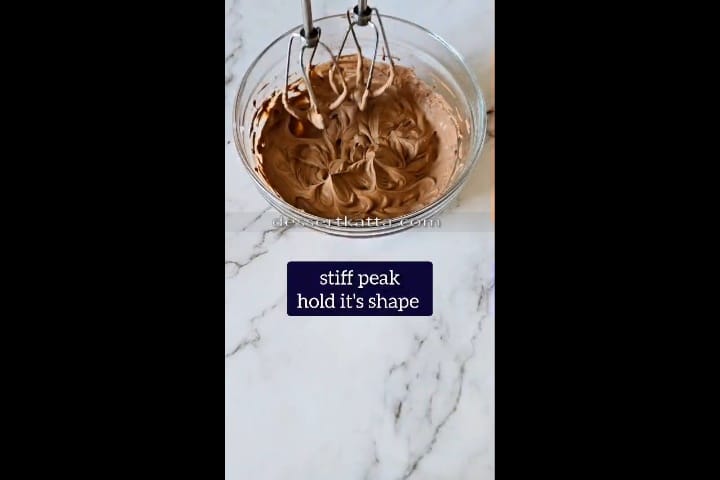
- Increase the speed to medium and continue beating for 1 -2 minutes.
- Stop in between, scrape the sides and continue until it forms stiff peaks. DO NOT overbeat as cream will get separated.

- Pour in serving bowl. Cover with plastic wrap and keep in refrigerator for an hour or two.
- Serve chilled by adding some regular whipped cream on top and Enjoy!
Substitutes in chocolate mousse recipe
- Coconut cream – you can replace heavy whipping cream with coconut cream in 1:1 ratio to make it vegan chocolate mousse.
- Sweetener – To make it sugar free, you can replace icing sugar with sweetener but make sure to add 1 teaspoon of corn starch to that. If you can use powdered version of sweetener, It will be great.
- Dark cocoa powder – You can also use hersheys dark cocoa powder instead of dutch processed cocoa powder. Since, cocoa powder is star ingredients in this recipe I would highly recommend to use either dutch processed or dark but no-no to regular cocoa powder.
Cocoa powder chocolate mousse – storing and freezing instructions
I will hardly have leftovers with this chocolate mousse recipe but here are some tips in case if you have any leftovers 🙂
Cocoa powder chocolate mousse – storing instructions
You can not store it at room temperature. It needs to be refrigerated as it contains perishable whipped cream. Store in air tight container and cover it with plastic wrap. You can easily store in refrigerator for 2-3 days.
Cocoa powder chocolate mousse – freezing instructions
Usually we store in freezer if we want to store it for long period of times like months. As regular whipped cream has tendency to deflate after couple of days, I would not recommend to freeze and anyways, you can make this in just 3-5 minutes so why to waste freezer space too :).
But if you freeze the chocolate mousse, just thaw it overnight in refrigerator and whip it chilled for 2-3 minutes and you are all set.
Tips to make perfect chocolate mousse with cocoa powder
- Chilled bowl and whipping cream – To get the perfect consistency, please do not forget to chill the bowl and whipping cream. If you are in hurry, just pop it in freezer for 10 minutes and you are all set. PS: whipping cream should be chilled and should not be in frozen state.
- High quality ingredients – The flavor of this chocolate mousse comes from cocoa powder and vanilla extract. I have tried with different types of cocoa powder like dutch processed, dark cocoa, regular cocoa powder and the winners are dutch processed and dark cocoa powder.
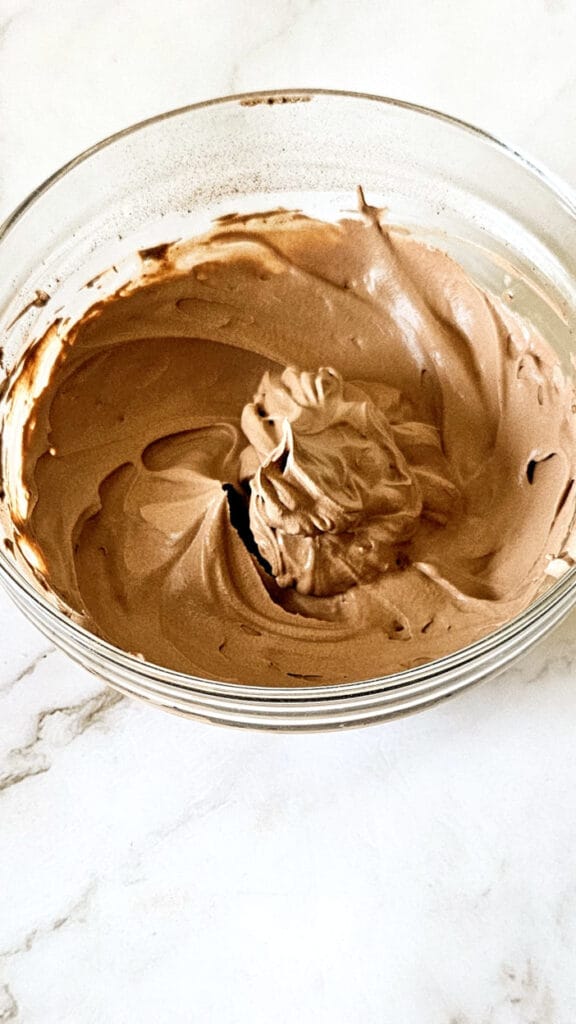
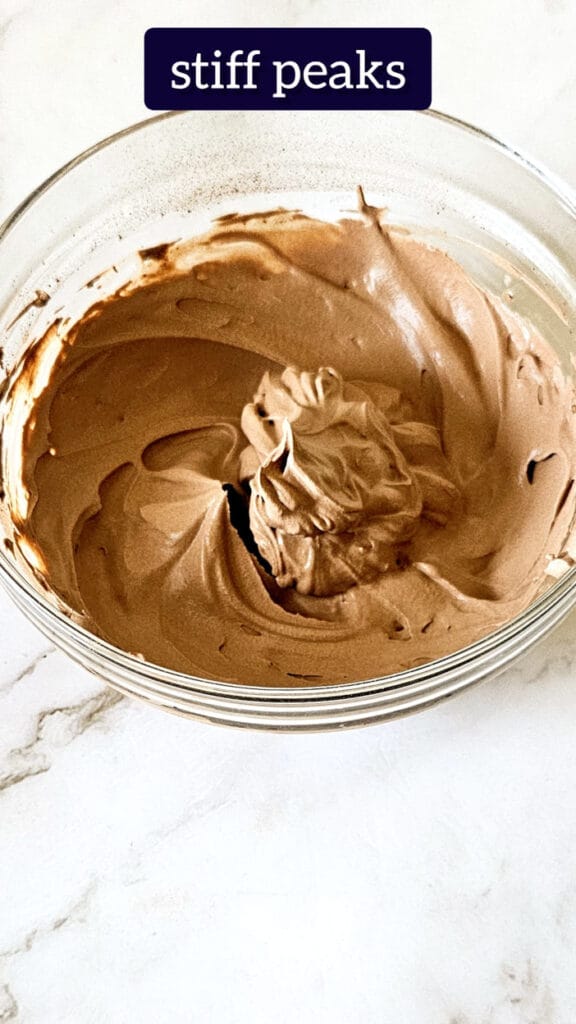
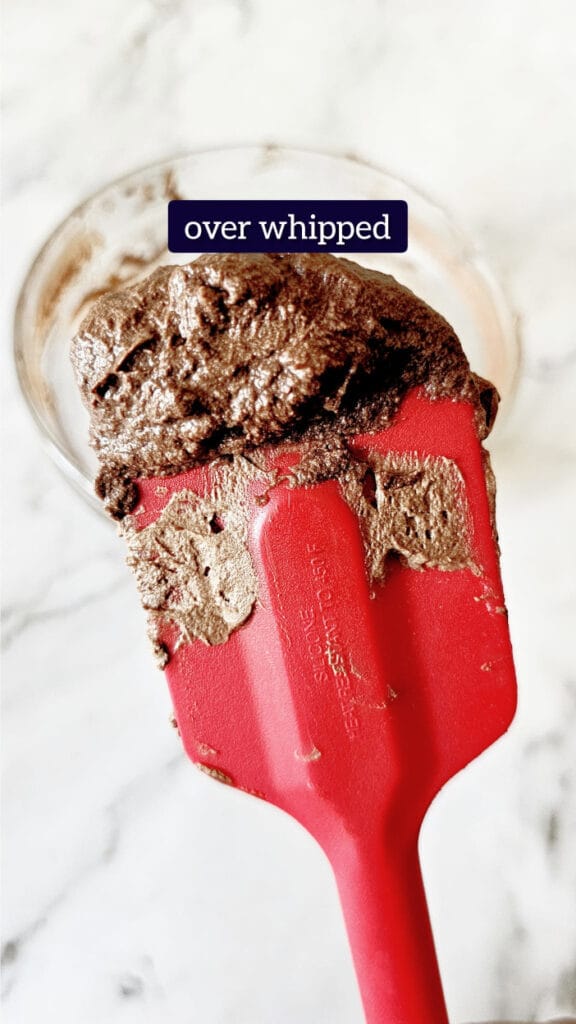
- Do not overwhip – Whip the ingredients together until it reached stiff peaks. Now, you must be wondering what is stiff peaks? Stiff peaks means cream should look silky and hold its shape when lifted with spoon. Overwhipping will separate the cream and will look grainy.
Cocoa powder chocolate mousse – FAQ’s
Why is my chocolate mousse not fluffy?
It is because your cream is not whipped up properly. It is very important to use chilled cream, chilled bowl and chilled beaters to nicely whip up the cream. If cream is warm, i would recommend to do it over ice cubes.
Is there any substitute for icing sugar in mousse?
If you do not have have icing sugar, you can use homemade powdered sugar but do not forget to add corn starch. Corn starch will help to make it stable.
What is thickening agent in mousse?
Corn starch is the main thickening agent. It is already available in store bought icing sugar or confectioners sugar. But if do not have that, you can also make powdered sugar at home.
What’s the best way to store this easy chocolate mousse ?
It is very rare that I have any leftovers for this chocolate mousse made with cocoa powder but in case if you have leftovers, you can store in air tight container and cover it with plastic wrap. Please follow my storing and freezing instructions for the same.
Can we use this chocolate mousse recipe to make vegan chocolate mousse?
Absolutely, just replace the regular whipping cream with coconut cream in 1:1 proportion.
How do I know when the mousse is done?
It should look soft, silky and should hold it’s shape if you lift the mixture with spoon or fork. I have shown three different stages of whipped cream below.
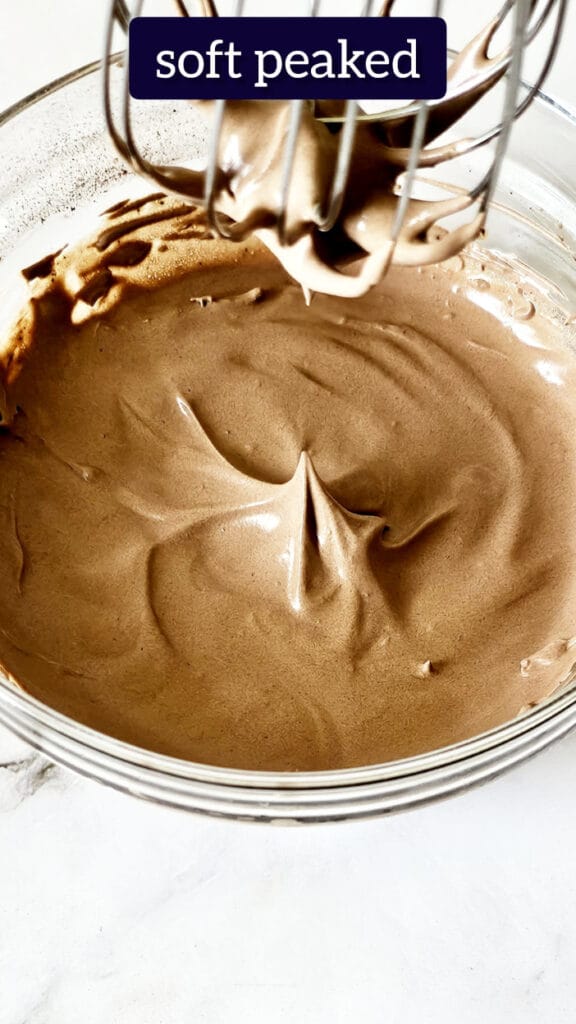
- Soft peaks (Under whipped) – In this case the cream is whipped until soft peaks and will not hold it’s shape.
- Stiff peaks (Correctly whipped – Here, it is perfectly whipped with silky texture and it will also hold it’s shape.
- Over whipped (In this case, it looks like the cream is separated and turned in to butter.
Can I make this in advance?
You can make this in advance but I would not recommend doing that. The reason is whipped cream may loose it’s stability after sometime as we are not adding any stabilizing agent such as gelatin.
But, do not worry. You can easily fix it. Just whip it for a minute or two and you are good to go.
Request
Please let me know how this recipe turns out for you in the comments! I really love hearing from you, and your feedback is very much important to me.
Tag @DessertKatta or Hashtag it # DessertKatta
Detail recipe card
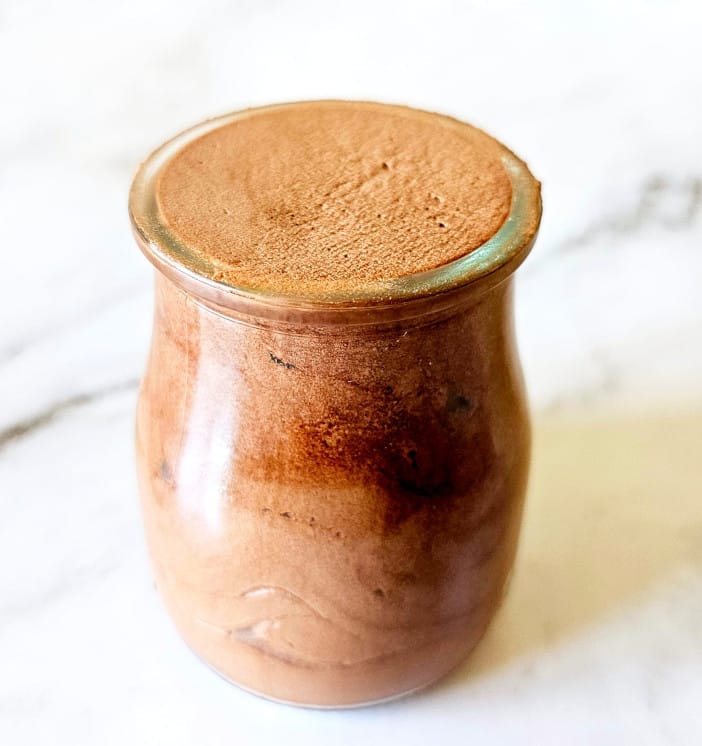
Chocolate Mousse Recipe Made With Cocoa Powder
Ingredients
Recipe
In a chilled glass bowl, add chilled whipping cream, dutch processed cocoa powder, icing sugar, vanilla extract and salt. If you are using stand mixer then placed stand mixer bowl in freezer for at least 20 minutes. (I am using hand mixer so I am doing it in regular glass bowl)
Chilled whipped cream whips up faster and nicely than warm whipped cream. If your cream is warm. Place the bowl over lots of ice cubes and you are all set.Notes: 1/2 cup (240mL) heavy whipping cream, 2 tbsp (12 gms) Dutch processed cocoa powder, 2 tbsp (38g) icing sugar, 1/2 tsp vanilla extract, pinch of saltStart whipping on low speed so that all ingredients will come together nicely.
Increase the speed to medium and continue beating for 1 -2 minutes.
Keep a close watch. Overwhipping just by few seconds will ruin the chocolate mousse.Stop in between, scrape the sides and continue until it forms stiff peaks. DO NOT overbeat otherwise whipping cream will get separated.
Pour in serving bowl. Cover with plastic wrap and keep in refrigerator for an hour or two.
Serve chilled by adding some regular whipped cream on top and Enjoy! (Optional). You can enjoy it as is.


