The BEST Red Velvet Cheesecake Brownies

If you are a fan of the rich, indulgent taste of red velvet cake and the creamy goodness of cheesecake, then you’re going to adore these red velvet cheesecake brownies!
They combine the best of both worlds—decadent, fudgy brownies and smooth, tangy cheesecake—into one irresistible dessert.
Perfect for any occasion, these brownies are a showstopper, whether you're serving them at a party or just treating yourself after a long day.
What’s even better? They’re super easy to make! With just a few simple ingredients, you can create a dessert that looks fancy but is surprisingly simple to whip up.
So, let’s dive in and get baking—you won’t want to miss these red velvet cheesecake brownies!
Why you will love these red velvet cheesecake brownies?
So, why should you choose these red velvet cheesecake brownies over other brownies? let's find out why?

- Rich, decadent, yet easy to prepare.
- Takes it to the next level by adding cheesecake layer.
- Great for sharing.
- A treat to the eyes - looks extremely gorgeous with the red and white swirls.
- Ideal dessert for red velvet and cheesecake lovers.
- An alternative bite-sized dessert to the cheesecake factory's red velvet cheesecake.
How to make red velvet cheesecake brownies recipe?
Making these red velvet cheesecake brownies is super simple, and here’s how it goes.
| Sr. No. | Steps |
| 1. | Make the brownie batter. |
| 2. | Prepare cheesecake swirls mixture. |
| 3. | Create a swirl effect. |
| 4. | Bake it together. |
| 5. | Cool, slice, and serve. |
Red velvet cheesecake brownies ingredients
Here is a detailed list of ingredients to make red velvet cheesecake brownies. Please refer to the recipe card at the bottom of this blog for exact measurements.

Red velvet brownie ingredients
All-purpose flour – The backbone of our brownies! Flour gives the brownies their structure and helps them rise into that perfect fudgy texture.
Cocoa powder – This is what gives the brownies that rich, chocolatey flavor and helps create the beautiful red velvet color we all love. It’s the key to getting that deep, velvety taste.
Sugar – Sweetness is essential in brownies! Sugar not only adds the right level of sweetness, but it also helps the brownies get that nice, chewy texture.
Butter – This adds moisture and richness to the brownie base. Plus, it helps make the texture wonderfully soft and melt-in-your-mouth.
Eggs – Eggs bind everything together and give the brownies structure. They also help create that perfect, fudgy consistency.
Vanilla extract – A little vanilla adds a warm, aromatic flavor that complements the cocoa and balances the sweetness of the dessert.
Red food coloring – Of course, the signature red velvet color wouldn’t be the same without a little red food coloring. It’s what gives these brownies that striking red hue!
Salt - Just a pinch. As I always say, any dessert is incomplete without salt. Do not skip it unless you used salted butter.
Cheesecake swirl ingredients
Cream cheese – Now we’re getting to the cheesecake layer! Cream cheese is what gives the cheesecake its signature tangy, creamy flavor and smooth texture. Use high-quality cream cheese. My personal favorite is Philadelphia or Costco's signature Kirkland cream cheese
Sugar – Just like in the brownies, sugar helps sweeten up the cheesecake layer and gives it that smooth, velvety finish.
Vanilla extract– A touch of vanilla rounds out the flavors in the cheesecake layer and makes it even creamier.
Egg - This provides richness to our cheesecake layer. Make sure it is at room temperature so that it gets mixed easily with the rest of the ingredients.
Any substitute?
Sugar-free - Replace regular sugar with monk fruit sweetener in 1:1 quantity. Any sweetener is fine as long as it is in 1:1 replacement.
Red food color - Don't worry if you don't have any red food coloring. You can skip it completely. Your brownies just won't have the classic red velvet color, but they’ll still taste delicious. Trust me.
Tools needed
- Measuring spoons / cups - to measure ingredients.
- Weighing scale - to precisely measure ingredients.
- 9-inch square pan - to pour the brownie batter.
- Parchment paper - to cover the pan.
- Mixing bowls - to make the brownie batter.
- Whisk - To mix all of the brownie ingredients.
- Hand beater - to make cheesecake swirls mixture.
Red velvet cheesecake brownies (step-by-step) recipe
Make the brownie batter

- Preheat the oven to 350°F/180°C. Line an 8×8-inch baking pan with parchment paper.

- Place butter, cocoa powder, and salt in a large, heat-proof bowl. Microwave in 30-second intervals, stirring in between each interval, until melted.

- Add sugar and whisk until combined.

- Mix the eggs, vanilla extract, and vinegar, and whisk until combined.

- Add red food coloring, until desired color is reached.

- Add flour and gently fold, using a rubber spatula, just until combined.

- Set aside 3 to 4 tablespoons (1/4 cup) of the batter.

- Pour the rest into the prepared pan. Smooth the top.
Make the cheesecake swirls
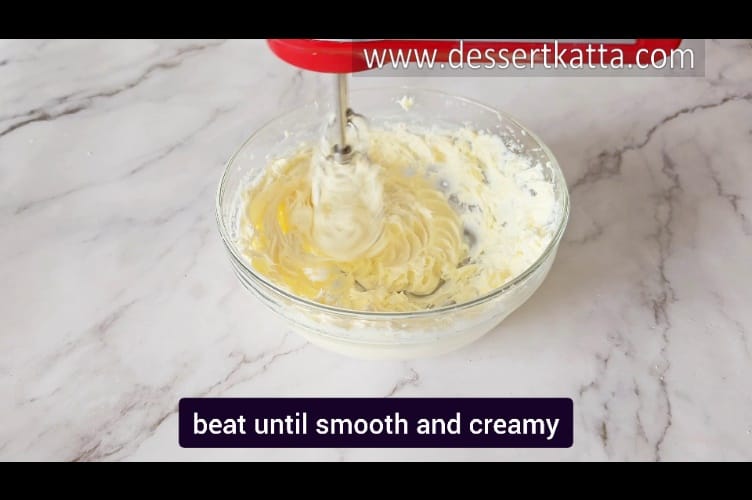
- Using a mixer or hand whisk, beat the cream cheese and sugar (on medium speed if using a mixer) until smooth.

- Scrape the sides and bottom of the bowl and beat again.

- Add egg and vanilla extract and beat until combined.
Make swirls

- Dollop a spoonful of the cream cheese mixture on top of the prepared brownie batter.

- Take the reserved 1/4 cup of brownie batter and spoon dollops over the cheesecake batter in a pan.

- With a knife or a skewer, gently swirl the two batters together to create a marble effect.
Bake

- Bake for 30 to 35 minutes until the cheesecake filling is set, and slightly puffed.

- Perform a toothpick test. The toothpick inserted into the center of the brownies comes out with moist crumbs (from the brownie batter), not dry.
Serve

- Let the brownies cool completely. Once cooled, cover with plastic wrap and then refrigerate for at least 2 hours until they are firm enough to cut.

- Once firm, lift them out of the pan using the parchment paper and cut them into squares. The brownies taste even better the day after they're made.

- Serve and enjoy!
How to serve?
These brownies taste delicious on their own. Here are some of my recommendations to make them even more tempting.
- Ice cream - Warm brownies and cold ice cream are a match made in dessert heaven. Add a scoop of vanilla or chocolate and make an excellent dessert. I always eat my dark chocolate brownies with a scoop of vanilla ice cream.
- Coffee - Pair it with your favorite cup of hot coffee and it will not disappoint you. You will want to make them again and again. Trust me!
- Whipped cream – A light and airy swirl of whipped cream on top adds a lovely touch.
Watch me making (video)
Storing and freezing instructions for red velvet cheesecake brownies recipe

Store them in the refrigerator (because of the cheesecake layer), or in the freezer.
Storing instructions
If you have any leftovers (which, let’s be real, is a big "if" with these brownies), simply cover them tightly with plastic wrap or store them in an airtight container. Keep them in the fridge for up to 3-4 days. They’ll stay fresh and delicious, ready for whenever you want a sweet bite!
Freezing instructions
Want to make a batch ahead of time or save some for later? You can freeze these brownies! Just let them cool completely, then wrap them individually in plastic wrap and place them in a freezer-safe bag or container. They’ll keep for about 2-3 months. Perfect for when you need a quick treat later on!
Thawing instructions
To thaw, simply take the brownies out of the freezer and let them sit at room temperature for about 30 minutes. If you want to enjoy them warm, pop them in the microwave for about 15-20 seconds. The texture will be just as fudgy and amazing as when you first made them!
In short,
| Sr. No. | Storage Type | Days/Weeks/Months |
| 1. | Refrigerator | 4 to 5 days |
| 2. | Freezer | 2 months |
Secret tips to make red velvet cheesecake brownies recipe

Don’t overmix – When you’re mixing the brownie batter, be careful not to overmix! Overmixing can lead to dense brownies, and we’re going for fudgy and soft here. Just mix until everything is combined.
Use room temperature ingredients – For the best cheesecake layer, make sure your cream cheese is at room temperature. It’ll blend smoother and prevent any lumps. The same goes for the eggs in the brownie batter—room temperature helps everything come together nicely!
Swirl gently – When you add the cheesecake layer on top of the brownie batter, gently swirl it with a knife or toothpick to create that beautiful marbled effect.
Watch your bake time – Every oven is different, so keep an eye on your brownies toward the end of baking. The top should look set, but the middle might still be a bit jiggly.
Cool before cutting – I know it’s hard to just look at them, but if you let your brownies cool for at least an hour (or longer if you can wait!), the brownies will set and they’ll slice more cleanly without falling apart.
FAQ's
Can I use a different type of food coloring?
Yes! While red food coloring is traditional for red velvet, you can experiment with other colors if you’d like. Just be aware that it’ll just change the classic color/look, but the flavor will still be just as amazing!
How do I know when the brownies are done?
Brownies should look jiggly in the middle while they are still in the oven. And, the best way to check is to insert a toothpick into the center of the brownies. If it comes out with just a few moist crumbs (not wet batter), they’re done! Remember, the brownies will continue to cook a little once you take them out of the oven, so don’t overbake.
Can I make these brownies ahead of time?
Absolutely! You can make them a day or two ahead of time. They actually taste even better once they have had a little time to set. Just cover them with plastic wrap and store in an airtight container in the fridge, and they’ll stay fresh and delicious.
If you have any further questions, please feel free to drop a comment below and I will be happy to answer them :).
Want to try some other brownie recipes?
Here are some of my favorite brownies recipes
Did you make it?
Now it's your turn! Make those yummy red velvet cheesecake brownies and let me know how they turn out for you. I'd love to have your feedback.
Did you use an exact duplicate recipe, or did you add any of your favorite mix-ins, such as finely chopped chocolate, or any other frosting, such as ermine frosting? Whatever it is, please leave a remark about the experiment. I can't wait to hear about your creations.
If you post on Instagram, be sure to tag me @dessertkatta or use the hashtag #dessertkatta.
Recipe card
The swirls of red velvet color make them as beautiful as they are delicious, and they’re super easy to make—no special skills required! Whether you’re serving them at a party or enjoying them as a cozy dessert for yourself, these brownies are sure to impress.
- 1/2 cup Unsalted Butter (113 gms)
- 4 tbsp Unsweetened Cocoa Powder (21 gms)
- 1/8 tsp Salt
- 1 cup Granulated Sugar (200 gms)
- 2 Large Eggs
- 1 tsp Pure Vanilla Extract (5 ml)
- 1/2 tsp White Vinegar (2.5 ml)
- 1 to 2 Big Drops Of Red Gel Food Color
- 3/4 cup All-purpose Flour (90 gms)
- 8 ounces Full-Fat Cream Cheese, Room Temperature (224 gms)
- 1/4 cup Granulated Sugar (50 gms)
- 1 Large Egg
- 1/2 tsp Pure Vanilla Extract (2.5 ml)
- Preheat the oven to 350°F/180°C. Line an 8×8-inch baking pan with parchment paper.
- Place butter, cocoa powder, and salt in a large, heat-proof bowl. Microwave in 30-second intervals, stirring in between each interval, until melted.
- Add sugar and whisk until combined.
- Mix the eggs, vanilla extract, and vinegar, and whisk until combined.
- Add red food coloring, until desired color is reached.
- Add flour and gently fold, using a rubber spatula, just until combined.
- Set aside 3 to 4 tablespoons (1/4 cup) of the batter.
- Pour the rest into the prepared pan. Smooth the top.
- Using a mixer or hand whisk, beat the cream cheese and sugar (on medium speed if using a mixer) until smooth.
- Scrape the sides and bottom of the bowl and beat again.
- Add egg and vanilla extract and beat until combined.
- Dollop a spoonful of the cream cheese mixture on top of the prepared brownie batter.
- Take the reserved 1/4 cup of brownie batter and spoon dollops over the cheesecake batter in a pan.
- With a knife or a skewer, gently swirl the two batters together to create a marble effect.
- Bake for 30 to 35 minutes until the cheesecake filling is set, and slightly puffed.
- Perform a toothpick test. The toothpick inserted into the center of the brownies comes out with moist crumbs (from the brownie batter), not dry.
- Let the brownies cool completely. Once cooled, cover with plastic wrap and then refrigerate for at least 2 hours until they are firm enough to cut.
- Once firm, lift them out of the pan using the parchment paper and cut them into squares. The brownies taste even better the day after they're made.
- Serve and enjoy!
Thank you for visiting DessertKatta. Please follow Dessert Katta for more dessert recipes by Sayali Bhave.