Stable Whipped Cream Recipe

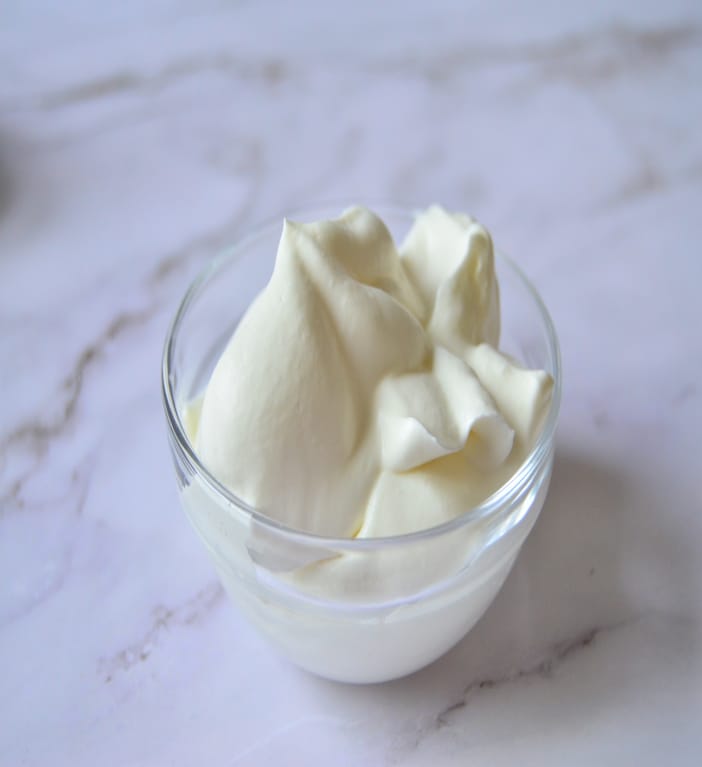
How to make stable whipped cream? Just follow my recipe which uses just 3 ingredients and 5 minutes of your time.
Have you ever tried homemade whipped cream, piping it on cheesecakes or on milkshakes or frosted the cake with it? And after couple of hours realized that, it just deflated?
Aww, I can feel you. No one likes that, right? Your efforts are all wasted, right? Don’t worry, I have got you and here is the solution for your problem, Stable or Stabilized whipped cream.
This can be made at home with easily available ingredients irrespective of what part of the world you are in and will hold its shape beautifully.
I have mentioned 5 different ways (Gelatin, Corn starch, pudding mix, milk powder and cream of tartar) to make this.
In some part of world, you get non-dairy whipping cream. It is usually sold in frozen state. You just need to thaw it for 1-2 hours before using.
Once thaw, just whip up to right consistency and you are done. Isn’t it simple?
Of course, it is simple but, have you wondered what kind of ingredients does it have? It contains lots of preservatives and I personally don’t like to put so much preservatives in my body.
It is so easy, quick, free from any preservatives. Once you make this at home, you will never buy a tub of artificial whipped topping, Trust me!
Why this is the best stabilized whipped cream?
- Very easy and really quick recipe
- Tastes same as whipping cream
- Will hold its shape and can pipe beautifully
- No preservatives
- Tastes way better than store-bought tub of whipped cream
Ingredients
Common ingredients for stable whipped cream:
- Heavy whipping cream
Use any cream with minimum 35% fat percentage such as whipping cream or heavy whipping cream or double cream.
- Powdered sugar
This is to add sweetness. You can also use icing sugar or confectioners’ sugar. They all are same just named differently depending on which part of the world you are staying. If you are in hurry and do not have time to go to grocery store, then you can make powdered sugar at home. I have a very detailed post on my blog to make this at home.
- Vanilla extract
Our whipped cream is incomplete without this ingredient. It will take our cream to next level. Do not skip it. You can use pure vanilla extract or vanilla essence, whichever is available to you. I would not recommend using vanilla bean paste because it will add little black dot to the frosting will change it’s look. If you need pure white whipped cream, add clear vanilla extract.
Stable whipped cream ingredients for gelatin method:
- All above and Gelatin
Use unflavored gelatin. You can use gelatin powder or gelatin sheets, anything is fine. This is the most common ways to stabilize the whipping cream. It has the most extended shelf life. It’s not vegetarian so you can use agar-agar as substitute.
Stable whipped cream ingredients for corn starch method:
- All above and corn starch
Use corn starch or corn flour, they both are same. I usually use this if I am making a dessert for same day or a day in advance.
Stable whipped cream Ingredients for milk powder method:
- All above and milk powder
It will give you two benefits. First, it uses starch in milk powder to stabilize the cream and second, it gives the milky taste unlike the starch in corn starch so it tastes better.
Stable whipped cream Ingredients for cream of tartar method:
- All above and cream of tartar
I am not sure about its exact effect but I read it that cream of tartar is used to stabilize according to fine cooking so I gave it try and it worked 😊.
Stable whipped cream ingredients for pudding mix method:
- All above and pudding mix
Pudding mix contains starch too. So, our purpose is solved.
Equipments required to make this whipped cream recipe
- Mixing Bowl
- Measuring cups
- Measuring spoons
- Hand mixer or stand mixer
Overview: How to make sturdy whipped cream
I have mentioned step by step recipe with images below and also mentioned all the details in recipe card but let’s quickly understand the basic steps before you start.
The steps are same for all 4 ways except the gelatin way.
The Overview for all other 4 methods:
- Whip up the cream until it reaches soft peaks.
- Add remaining ingredients and whip up until stiff peaks.
The overview for Gelatin Method:
- Bloom the gelatin.
- Mix whipping cream, vanilla extract and powdered sugar until soft peaks.
- Mix in gelatin and whip up till you get right consistency.
Step by step preparation photos to make stabilized whipped cream from scratch


- Keep the glass bowl in refrigerator for 15-20 minutes. You can also keep it in freezer for 5-10 minutes if you are in hurry.
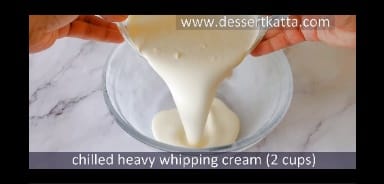
- Add chilled whipping cream in chilled glass bowl.


- Start whipping cream using hand beater. You can also use stand mixer but I would highly recommend using hand beater as it goes to over whipped stage in just 1 minutes.
- After 1-2 minutes of whipping, add icing sugar to the cream.


- continue whipping on medium speed for 3-4 minutes and your stable whipped cream is ready.
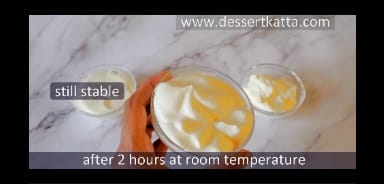
- Keep the whipped cream outside for 2 hours and you can see it is still stable.
Coloring stable whipping cream
Usually, whipped cream is white in color but if you making it to decorate a cake for any occasion, you can easily color it. However, it is difficult to get strong, bright color with whipped cream frosting. Two important things to keep in mind:
- Use Gel Colors
I would highly recommend to use gel colors. Strict No-No to liquid colors as it will change the consistency of cream.
- Add the color at very beginning
Add the gel colors before you start whipping the cream. Gently mix it using whisk, check the color. If it is ok, start whipping using hand mixer or stand mixer. Whipping cream will turn into whipped cream in few minutes. So, it is very important to check if color is ok at the beginning only. Because, if you overwhip, it will turn into butter.
My secret tips to make best stable whipped cream recipe
- Do not overwhip
Do not overwhip the cream. Overwhipping the cream will turn the cream in to butter. So, whip up until it forms stiff peaks. Once it is at soft peaks, it will quickly reach the final stage.
So, I would highly recommend to keep a close watch.
Do not start the mixer and do other chores. You can also use do this using hand mixer. I personally feel, you will have more control over hand mixer in stand mixer, particularly in this recipe.
- Use chilled cream and bowl
For quick and best result, please make sure your cream is chilled. Keep your mixing bowl, handles and cream in freezer for 4-5 minutes.
Remember, it should be chilled not frozen.
If you are in hurry then take a bigger bowl full of ice cubes and whip your cream on top of that.
- Soak gelatin for sufficient time
It is important to mix the gelatin in water and keep it for few minutes.
If you skip this step, you will have grainy lumps in whipped cream. So, be patient and wait as directed in recipe.
- Temper the gelatin:
When it is time to add gelatin in the cream, make sure to take a spoon or two of whipping cream, add in the gelatin and mix it well.
This is called tempering the gelatin. You must have done this to temper the eggs while making vanilla pudding. Pour this back into the bowl and whip up.
PS: If you directly add the gelatin into whipping cream, it may seize and will cause lumps.
Sturdy whipped cream video tutorial
Stable whipped cream - FAQ's
- Does stabilized whipped cream tastes different?
No, stabilized whipped cream tastes same as regular whipped cream. It is thicker and long-lasting than regular one which is what we need 😊
- Does stabilized whipped cream melt?
No, stabilized whipped cream is meant to hold its shape for days. In fact, you can easily use this to frost your cakes, for piping. I promise, it will not lose its shape and will not melt.
- How long does stabilized whipped cream last?
It stays perfectly fine up to 2-3 days if kept in refrigerator. Take it out just before serving.
- How to store this stable whipped cream?
As this is perishable, it is always recommended to store the whipped cream in refrigerator. Store in an air tight container and put it in fridge. It stays on up to 2-3 days.
- Can you frost a cake with this stable whipped cream?
Yes, absolutely. This is best for frosting and piping. You can easily use it for filling and frosting. I have used in many cakes likes red velvet pastry, black forest cake.
Important: This is not the best base for fondant. Whipped cream is very light, so it won’t able to handle the weight of fondant and it also content lots of liquid. Because of this, it will make out fondant wet.
But you can cover the cake frosted with whipped cream with mirror glaze. So, just keep it as it is or additionally cover it with mirror glaze.
- How to fix overwhipped cream?
As I mentioned above, overwhipping will turn the cream into butter. So, if you have overwhipped by mistake, stop immediately. Add couple of teaspoons of cream and gently stir it using hand whisk and NOT MIXER.
- Can I color whipped cream?
Yes, please refer my above section on coloring whipping cream.
- How to serve whipped cream?
You can serve the whipped cream with any dessert. It is that versatile. To name a few, it goes well with a slice of cheesecake, milk shakes, chocolate pie.
Recipes where you can use this stable whipped cream
- Red velvet pastry
- Black forest cake
- On milkshakes
- On cheesecakes or sides of cheesecake
Request
Please let me know how this recipe turns out for you in the comments! I really love hearing from you, and your feedback is very much important to me.
Tag @DessertKatta or Hashtag it #DessertKatta
Recipe Card
- 1 cup Heavy Whipping Cream (240 ml)
- 2 tbsp Icing Sugar (30 gms)

Keep the glass bowl in refrigerator for 15-20 minutes. You can also keep it in freezer for 5-10 minutes if you are in hurry.

Add chilled whipping cream in chilled glass bowl.

Start whipping cream using hand beater. You can also use stand mixer but I would highly recommend using hand beater as it goes to over whipped stage in just 1 minutes.

After 1-2 minutes of whipping, add icing sugar to the cream.

Keep whipping on medium speed for 3-4 minutes and your stable whipped cream is ready.

Keep the whipped cream outside for 2 hours and you can see it is still stable.
Thank you for visiting DessertKatta. Please follow Dessert Katta for more dessert recipes by Sayali Bhave.


